Every club and every venue is different. A main stand with numbered seats, a standing terrace behind the goal, a section for away fans and a few wheelchair spaces at the front. If you want to sell tickets for fixed seats, you first have to get that plan into the system properly once. That shouldn't take days and it shouldn't be a job for a technician.
In Clubwise you draw the plan yourself in the back office, and your supporters then see it the way they know their stadium or venue. Here's how it works, from floor plan to seat.
1. Drawing the sections
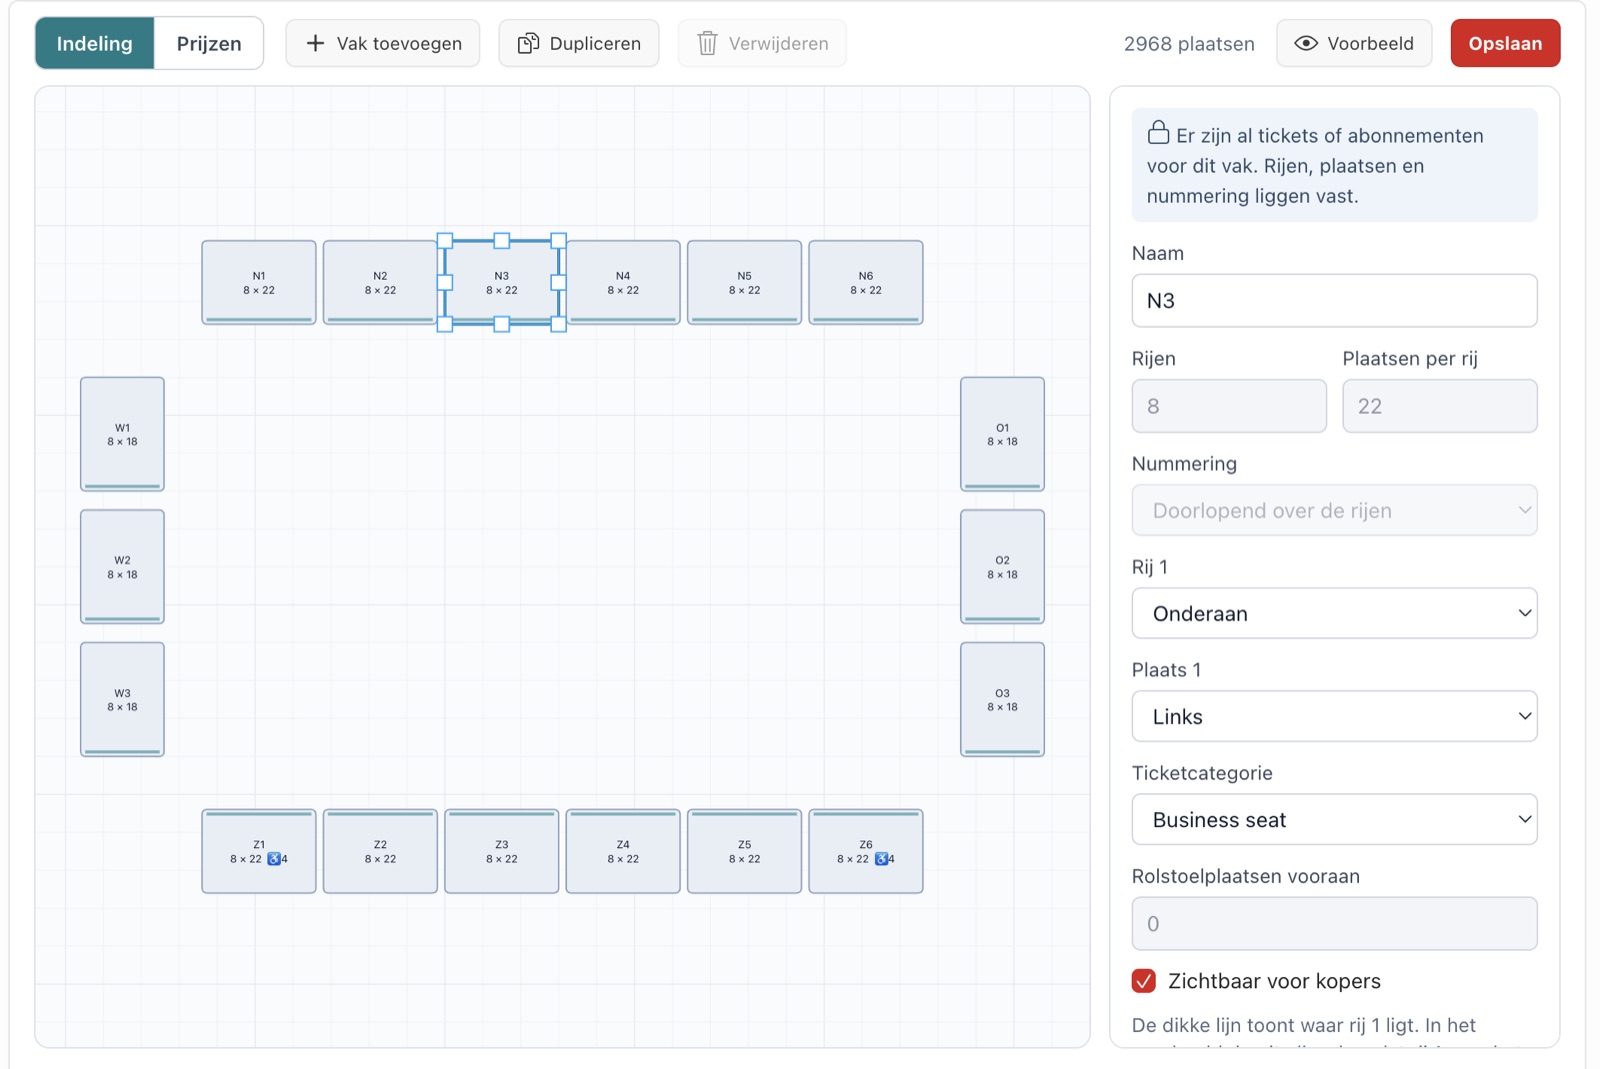
Under Settings, Locations you open the stadium plan. In the mode Layout you add a section, drag it into place and drag the corners to make it bigger or smaller. Scrolling zooms. If one stand looks like another, then duplicate the section and only change the name.
Per section you choose the ticket category, for example standard, away fans or business seat. That category later determines in which overview and at which price the section is sold.
2. Rows and seats as in real life
Per section you enter the number of rows and seats per row . You choose whether row 1 is at the top or at the bottom, and whether seat 1 starts on the left or on the right. The numbering runs per row (1, 2, 3 in every row) or continuously across the whole section. You put wheelchair spaces at the front, and with Visible to buyers you decide whether a section appears in the sale.
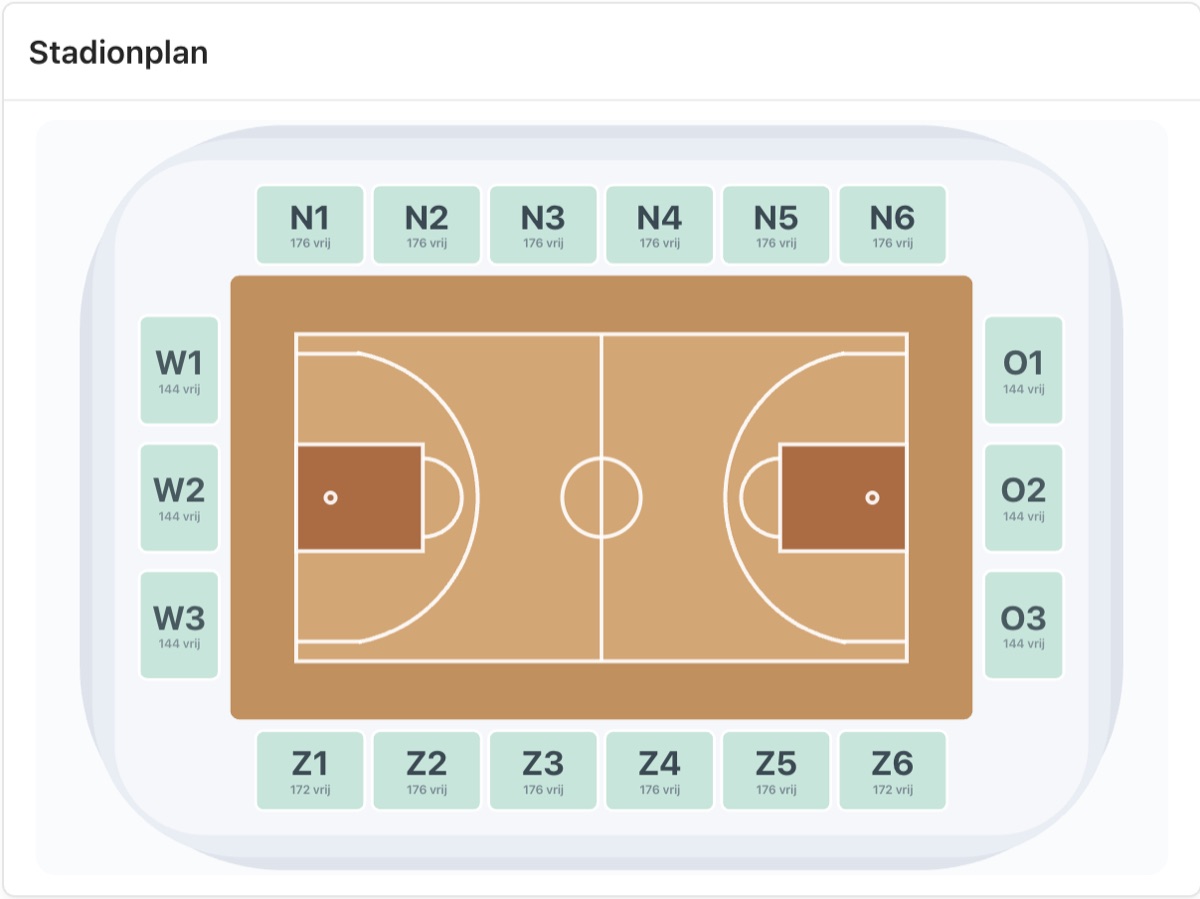
In the preview you see the result right away: each section rotates so that row 1 faces the pitch, the way a supporter sees it when they come in.
3. The pitch in the middle
At the location you choose which pitch is in the middle of the plan: football, basketball, hockey, volleyball, handball, tennis, a stage or nothing. It is drawn in the back office, in the Ticket App and at the box office. That way a supporter immediately recognises where they sit, whether it's a football stadium, a sports hall or a venue with a stage.
4. Prices per section and per target group
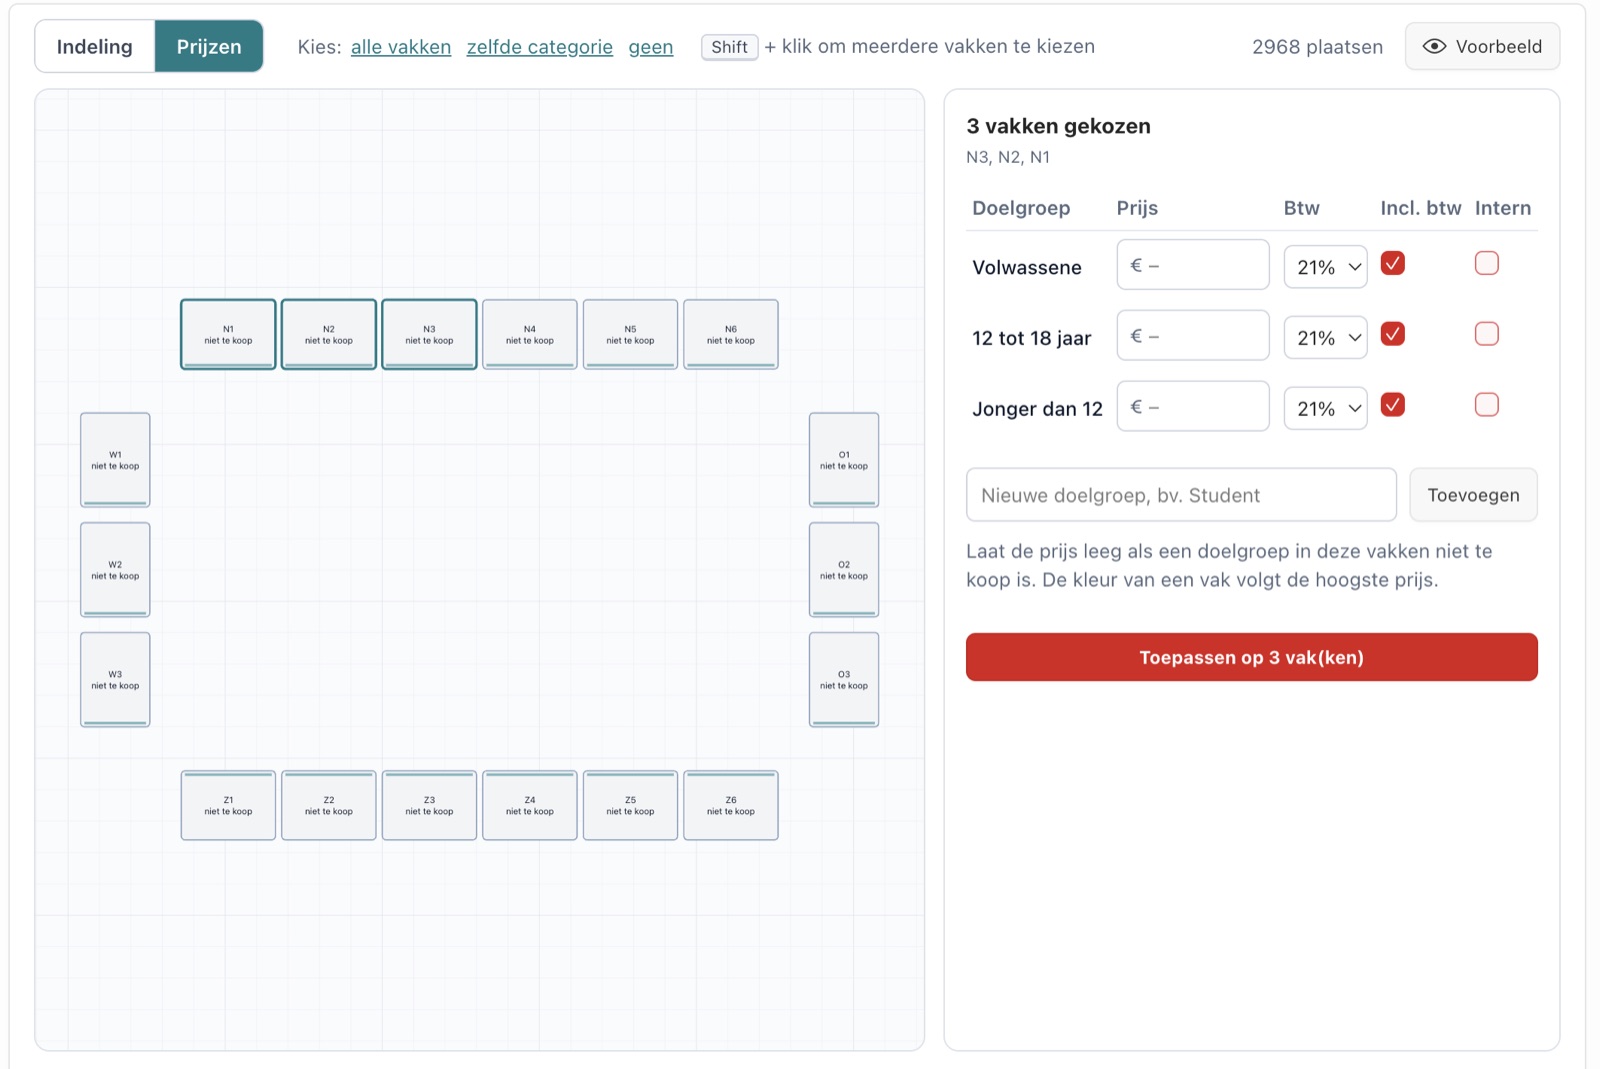
In the mode Prices you click a section and fill in a price per target group, for example adult, 12 to 18 years or under 12. Per target group you choose the VAT rate and whether the price includes VAT. If you leave a price empty, that target group cannot be bought in that section. A target group you set to internal , you only sell at the box office and in the back office, for example for guests or staff.
With Shift you choose several sections at once, or you choose in one click all sections or all sections of the same category. You then fill in a price once for all those sections. You add a new target group, such as student, on the spot. The colour of a section follows the highest price, so you see at a glance where the most expensive seats are.
Those prices apply to new events at this location. Per event you can still adjust them, for example for a top match or a benefit.
5. Everything at a glance
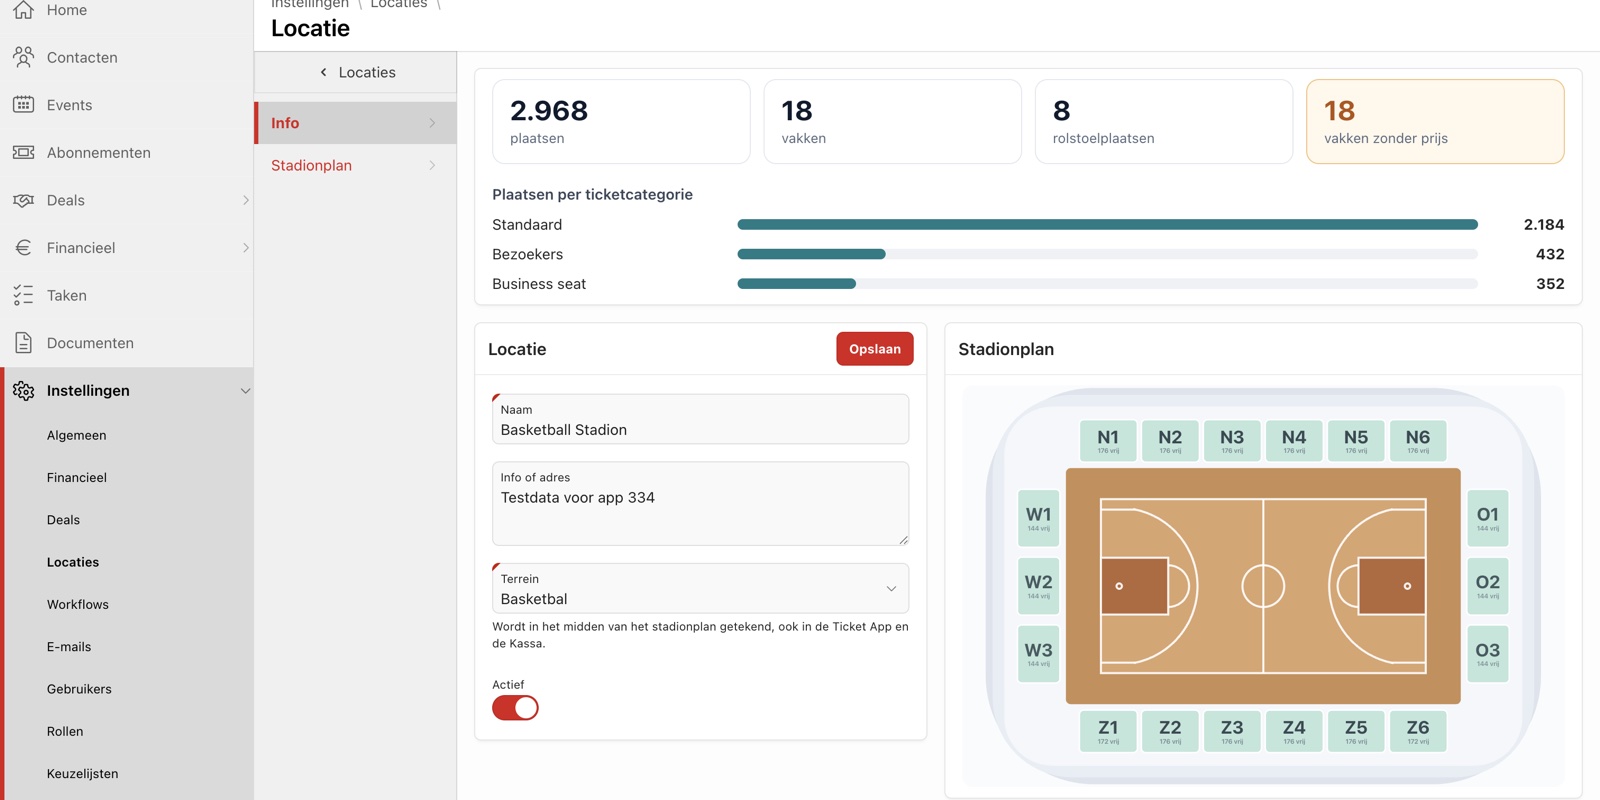
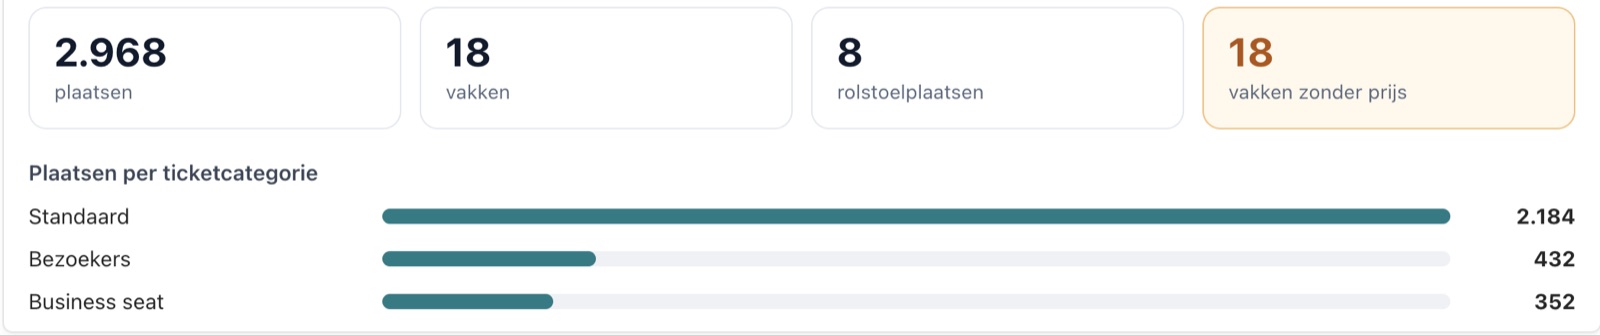
On the record of the location you see at the top the total number of seats, sections and wheelchair spaces, and how many seats there are per ticket category. If there are sections without a price yet, you see that right away in a conspicuous box. That way you don't forget a stand before sales open.
6. What the supporter sees
In the Ticket App and at the box office the buyer always sees the whole stadium, with the pitch in the middle. They tap a section and choose their seats, with the target group and the price per seat. Sections that are not for sale for this event remain visible but greyed out, so they can still find their way.

7. Changing safely during the season
A plan changes, even in the middle of the season. That's why Clubwise protects what has already been sold. Once there are tickets or season tickets for a section, the rows, the seats and the numbering are fixed. That way nobody accidentally moves a season ticket holder to another seat. A section you no longer use, you make invisible instead of deleting it.
Tip: first draw all sections and their category, and only then fill in the prices. Then choose all sections at once per category, and you have priced the whole stadium in a few minutes, instead of section by section.
Finally
A good seating plan is the basis of every ticket sale for fixed seats. If you can draw and adjust it yourself, and the supporter recognises it as soon as they open it, you sell faster and get fewer questions at the desk.
Your own stadium or venue in Clubwise?
In a free demo we show how to draw your plan and how your supporters choose their seat on it.
Request a free demo →